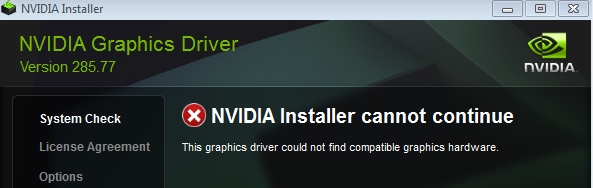
Many users have complained of receiving the error message “NVIDIA installer cannot continue” when they try to install NVIDIA graphics driver.
Are you facing this issue as well?
If the answer is “Yes”, this post is for you.
The error can occur for variety of reasons, and it might be difficult to pinpoint a specific cause.
Fortunately we have found 5 solutions to the”NVIDIA installer cannot continue” error. We’re sure at least one of them will work for you.
You don’t have to try every solution in this post. Start with the first solution. If it does not work for you, move to the next solution and so on.
Solution One – Check the status of NVIDIA graphics card
If the NVIDIA graphic card is disabled for any reason, you will receive the error”NVIDIA installer cannot continue”.
This happens because the installer would search for the NVIDIA graphic card on your PC and when it does not find it, it will return an error and close its operation.
Here are the steps to follow to fix the problem.
- Press Windows logo key and R simultaneously on the keyboard to invoke Run command
- In Run command, type devmgmt.msc and click OK
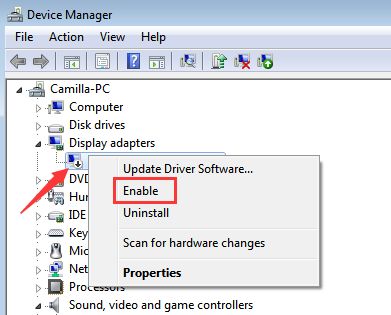
- In the Device Manager, go to display adapters category and expand it
- Look at the NVIDIA graphic cars item. Does it have a down arrow icon? If the answer is Yes, it is disabled
- Right-click on NVIDIA graphic card and click Enable from the menu
Reboot your computer
After rebooting run the NVIDIA installer.
If you are still getting the error ”NVIDIA installer cannot continue”, move to the next solution.
Solution Two- Check whether NVIDIA graphics card is detected
If the Windows OS does not detect NVIDIA graphics card, it could lead to errors like”NVIDIA installer cannot continue”.
Hence, you need to ensure whether the error is generated due to Windows not detecting NVIDIA graphics card.
Here are the steps to follow.
- Open Device Manager
- Go to Display adapters category and expand it
- Do you see NVIDIA graphics card listed there? If the answer is yes, you can skip the steps below and move to next solution
- If you do not see NVIDIA graphics card listed, you can conclude there is problem with hardware detection. In most case, unrecognized hardware is listed under Other Devices in Device Manager.
Go to Other Device category and look for device name.
Since the NVIDIA graphics card is not detected, the device in the list won’t have its real name. For example, the NVIDIA graphics card may be listed as Base System Device.
Before you proceed to downloading driver, you need to confirm the device that you are looking under other devices is actually a NVIDIA graphic card.
Here are the steps to follow to do this.
- Open Device Manager
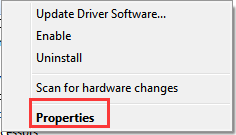
- Go to Other Devices and right-click the device you think might be the NVIDIA graphics card
- Select Properties from the menu
- In the Properties dialog box, go to Details tab
- Under Property heading, select Hardware ids
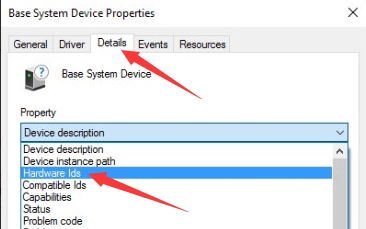
- The Hardware value would be the like the one shown in image below. Copy or write down hardware id.

In the hardware id- VEN stands for Vendor and Device.
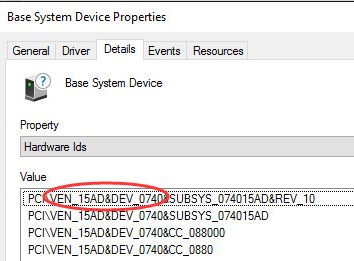
As per image above, the Vendor code is 15AD and Device code is 0740. You need to use this information to find out the device manufacturer and the device name.
- Open a browser and go to https://devicehunt.com/

- Enter the Vendor Code and Device Id in respective fields and click on search
If the Vendor name is NVIDIA and Device type is graphics card, you can go ahead and update drivers manually
Solution Three- Update NVIDIA drivers
Since the NVIDIA installer is not working, you should try updating the NVIDIA drivers manually through Device Manager.
Here are the steps to follow.
- Open Device Manager
- In the Device Manager window, go to Display adapter category and expand it
- Right-click on NVIDIA graphic card and click Uninstall
- Wait for the uninstallation process to complete and then reboot your system
- Now open Device Manager again
- Right-click on NVIDIA graphic card and click Update Driver Software
- In the next screen, click Browse my computer for driver software
- Now navigate to the NVIDIA folder where the setup had extracted files
- Make sure Include subfolders box is checked
- Click Next and wait for the process to finish
- Reboot your system
(Note- the above steps only installs display driver)
- Now go to the NVIDIA folder where the setup had extracted files and double-click on exe file(setup)
- Accept the terms and conditions
- Click Custom Install
- Check the box- Perform a clean install
The above steps will install all NVIDIA graphics features that were not installed in earlier installation.
If the manual driver update method is not working, you can use a driver update utility to update NVIDIA graphics driver. Here are the steps to follow.
Updating Drivers Automatically
Automatic driver update tools offer many benefits, the most important ones being:
- You can update device drivers automatically
- The software scans and updates all outdated or missing drivers at one go
- The tool picks the right drivers for your device and operating system, so you won’t have to worry about installing an incorrect driver by mistake
- Automatic driver updates are 100% safe
Driver Updater is one of the best driver update tools out there. Outbyte Driver Updater will give you access to a database of over 1 million drivers. It will regularly scan your PC, suggesting new driver versions to install. Driver Updater contains drivers for a variety of Windows devices. With just one click, you can update drivers in your system.
Step 1
Click here to Install and launch the app
Step 2
Scan all devices
Step 3
Install or update drivers automatically
Leave a Reply