The M310 is a popular wireless optical mouse, which you can use right out of the box. It features a sleek, ergonomic design and side grips. Whether you are a right-handed or left-handed, you can easily and comfortably use it. The M310 is affordably priced and connects with your device through a wireless USB-receiver.
However, like any other peripheral device, the M310 may encounter some issues. Generally speaking, the M310 errors are not serious and most times the user can fix it themselves by downloading the latest drivers. All the same, we recommend you perform some basic troubleshooting steps — discussed next — before you install the newest mouse drivers.
Basic troubleshooting steps for Logitech M310 Mouse Driver Errors
The M310 Logitech Mouse boasts a solid battery life — roughly 18 months. How long since you changed the battery? If it has been much longer than this then the first thing you should do is check your device’s battery.
The top of the M310 mouse has a small light which show if the power is low and you need to replace the battery.
If that doesn’t work, check the USB port into which the M310 nano-receiver is inserted. Doing this is really simple. Just insert the M310 USB receiver into another USB slot. If the mouse then works the problem was with the other USB port.
If none of these solutions work, you should update the M310 mouse device driver. You can do so manually or automatically. While updating drivers automatically is a far easier, simpler, and faster method, this post discusses both options in depth so that you can choose the one with which you are more comfortable.
Manually Update the Logitech M310 Mouse Driver
Basically, there are three ways to manually update your mouse drivers. These are:
- Install the latest windows update
- Update the driver through Device Manager
- Directly download the latest M310 driver from Logitech’s website
Here are the steps for each one of them.
Install the latest windows updates
Windows update may help update your outdated device drivers in addition to the system updates.
You can run Windows updates by performing these steps:
- Click the Start button
- Type “windows update” in the Start Search box. A list of options will appear; select Windows Update and then click Check for updates
- Windows will install all applicable updates. Follow onscreen instructions if any
- Restart Windows
Check if the M310 mouse error has been resolved. It is possible that Windows Update may not have the latest driver for your mouse. In this situation, you must manually download the newest driver by using any of the next two methods or automatically download it using a reliable driver update tool.
Manually download the M310 driver using device manager
Windows computers come with a number of utilities built-in. One such utility is Device Manager, which allows you to control attached hardware.
To update the M310 mouse driver through device manager, perform these simple steps:
- Click the Start button and then in the Start Search box type “run” and press the Enter key
- Now type “devmgmt.msc” in the run dialog box and then press Enter
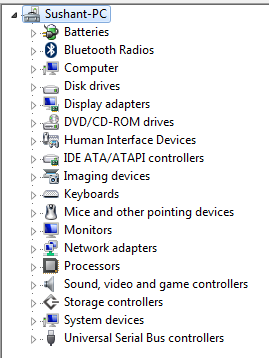
- In the device manager window, locate and expand Mice and Other Pointing Devices option
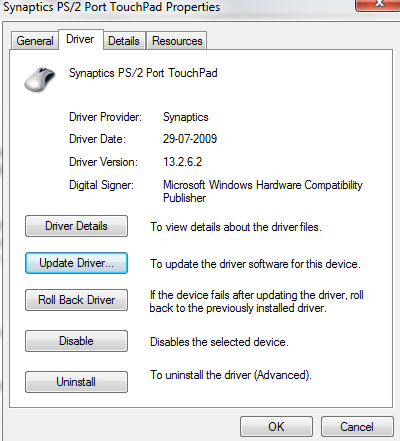
- Right-click on the M130 mouse and then click Properties
- Click on the Driver tab and then click on the Update Driver button
- Click “Search automatically for updated driver software” in the next window
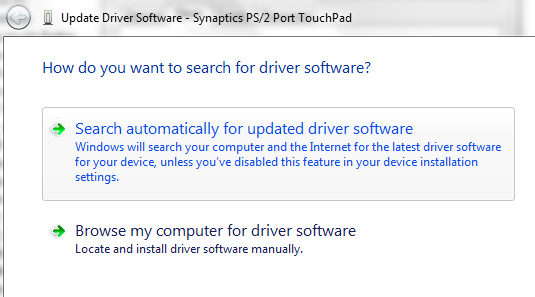
- Now, Windows is going to search for a driver update and automatically install it
If Windows is unable to find a relevant driver update, you must download it manually from the Logitech website.
Download the M310 mouse driver from the Logitech website
Here are the steps to follow:
- Open a web browser
- Go to the Logitech website
- Search for the latest driver for the M130 mouse. It’s important that you download the driver version that corresponds to your Windows PC or laptop. That means if you are using a 32-bit Windows, you must install drivers designed for 32-bit Windows, not 64-bit. And if you use a 64-bit Windows, click on the driver designed for 64-bit PCs or laptops.
- Save the downloaded file on your computer
- Double-click the .exe file to start the installation. Follow on-screen instructions, if any
- Reboot windows
Note: Always download drivers from the device manufacturer’s or your laptop manufacturer’s website, and not other websites.
Downloading the M130 driver automatically
Outdated drivers can cause serious problems with your PC. With Driver Updater keeping your drivers up to date is very easy. With just a few clicks, you can update all your drivers. A free trial of this Driver Update Tool means you can give it a try without commitment.
Automatic driver update tools offer many benefits, the most important ones being:
- You can update device drivers automatically
- The software scans and updates all outdated or missing drivers at one go
- The tool picks the right drivers for your device and operating system, so you won’t have to worry about installing an incorrect driver by mistake
- Automatic driver updates are 100% safe
Driver Updater is one of the best driver update tools out there. Outbyte Driver Updater will give you access to a database of over 1 million drivers. It will regularly scan your PC, suggesting new driver versions to install. Driver Updater contains drivers for a variety of Windows devices. With just one click, you can update drivers in your system.
Step 1
Click here to Install and launch the app
Step 2
Scan all devices
Step 3
Install or update drivers automatically
Leave a Reply