Windows 11 computers come with decent gaming capability out of the box. However, your PC’s default settings may not be able to keep up with the load put on it by heavy-duty games.
What to do then (especially if you don’t want to spend money on hardware upgrade)?
The answer is simple: Optimize your system for peak gaming performance. Follow the tips shared in this post for seamless gaming performance on your Windows 11 PC.
Tip #1 – Disable Startup Applications
When your computer boots, several applications start automatically with it. In most cases startup apps don’t affect gaming performance. However, applications with heavy resource consumption (CPU, GPU, RAM, and disk space) can certainly have a negative impact.
If you suspect a startup application of bringing down your PC’s gaming performance, consider disabling it. Here’s what to do.
- Press Ctrl + Shift + Del (or Ctrl + Shift + Esc)
- Click Task Manager
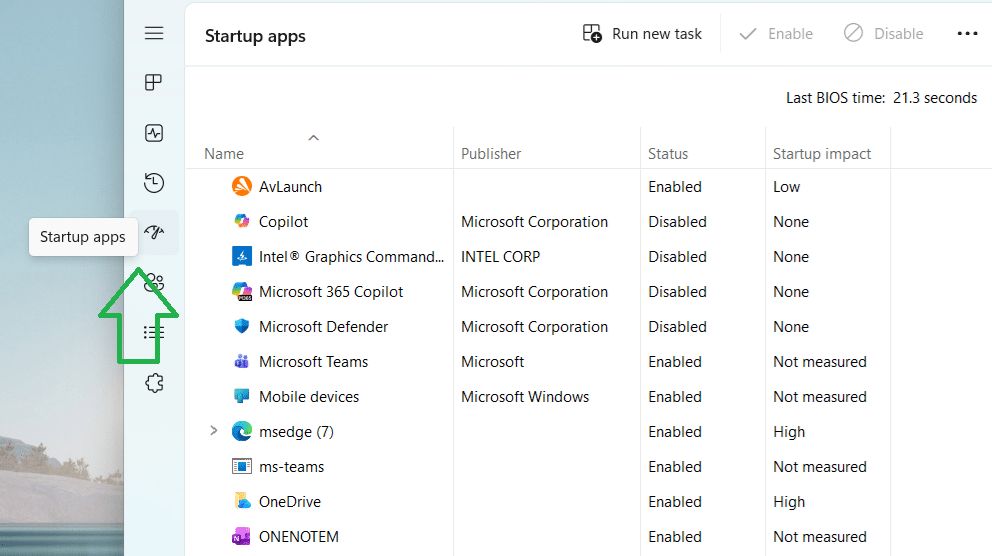
- Click Startup apps (If you don’t see this entry, click its icon in the left-hand side pane as shown in the image below)
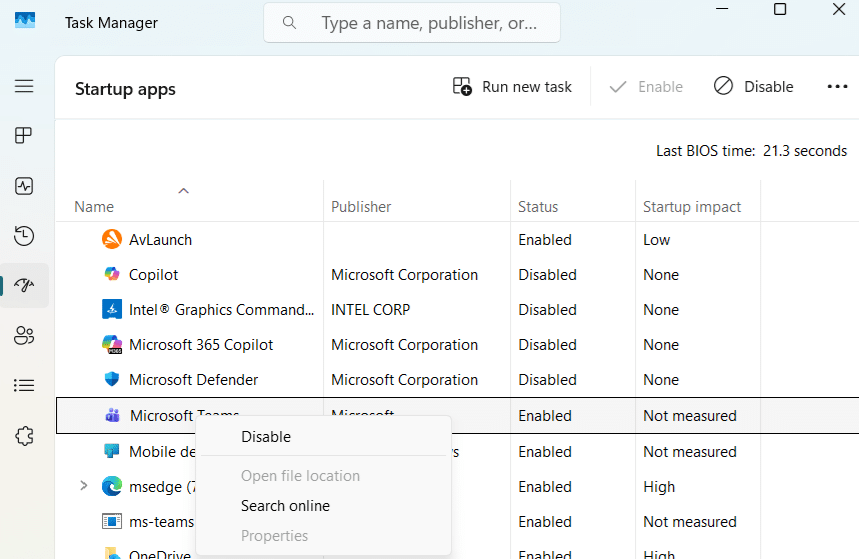
- Right click any app you want to disable and then choose Disable
Tip #2 – Disable Resource-hogging Apps
Disabling apps with heavy resource consumption before launching and playing a game can improve your gaming experience.
Here’s what to do:
- Press Ctrl + Shift + Esc
- Click Task Manager
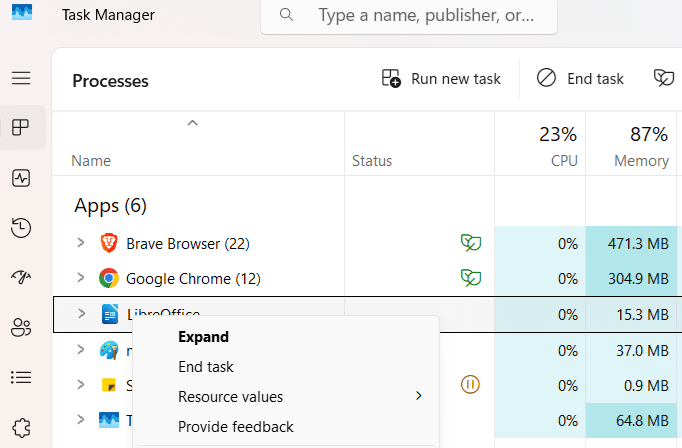
- You can sort the running processes by Memory or CPU usage
- Right-click any resource-hogging app and choose End Task
Go through the entire list of processes and disable all unnecessary apps.
Tip #3 – Turn off Visual Effects
Visual effects and special animations give your PC’s look a boost, but this comes at a cost. These effects eat up more-than-reasonable amount of system resources. If you think you’ll not miss them, disable them to improve PC performance by following the steps listed below.
- Type “settings” in the Search bar and hit Enter
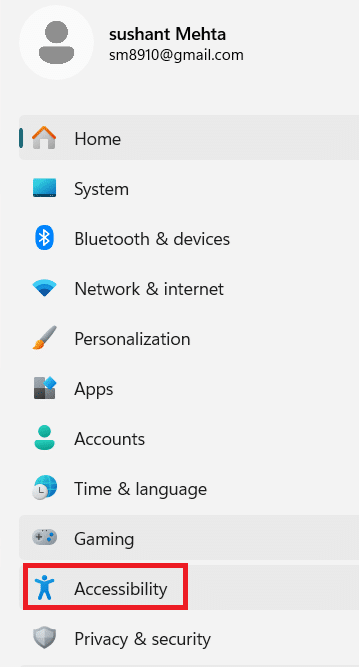
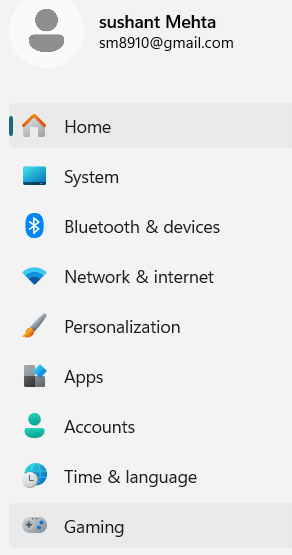
- Click Accessibility in the left-hand side pane and then click Visual effects

- Finally, toggle off Animation Effects
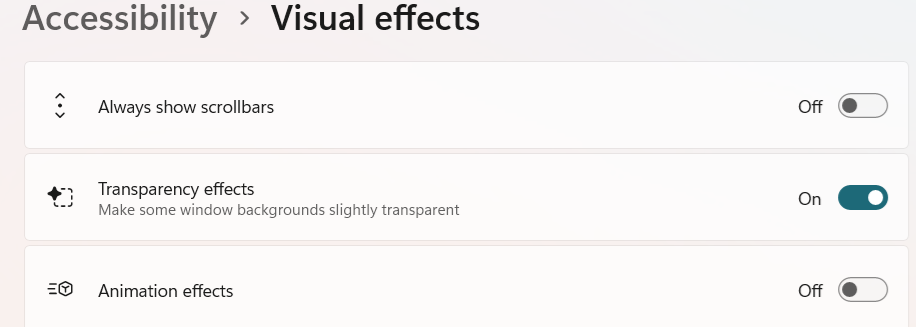
In case fonts and cases looks awkward, enable effects that are related to fonts and shadows. These effects have very little impact on PC performance.
Tip #4 – Make Sure Game Mode is Activated
Just like Windows 10, Windows 11 features Game Mode for uninterrupted gaming experience. If activated, Game Mode optimizes the PC for gaming and improves frame rates.
Here’s how to activate this feature:
- Type “settings” in the Search bar and hit Enter
- Select Gaming in the left-hand side pane and then choose Game Mode
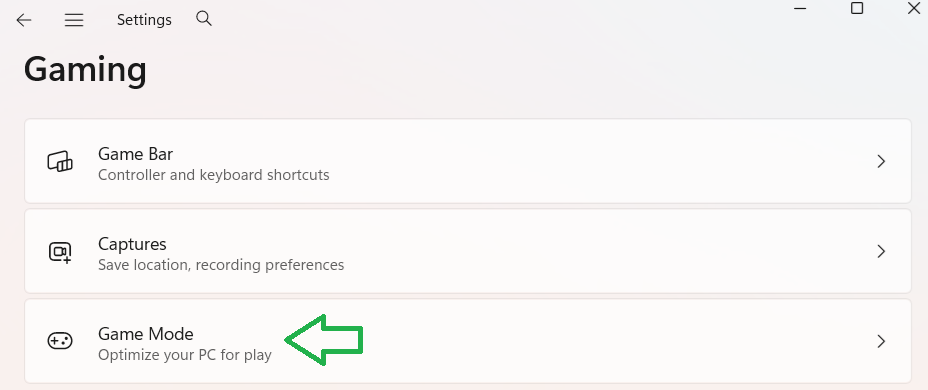
- Toggle on the switch next to Game Mode entry

Tip #5 – Enable the Ultimate Performance Power Plan
If you’re experiencing minor stutters while play games, enabling the Ultimate Performance power plan is a good idea. When it comes to performance, there’s not much difference in Ultimate Performance mode and High Performance mode. The former just doesn’t let even enabling of passive power saving feature. Hence, it is recommended for avoiding small interferences, such as when the frame time is not stabilized.
To enable this feature, you need to open Command Prompt (type “command prompt” in the Search bar in the taskbar at the bottom of your screen and hit Enter) and run the following command:
Next, type “power plan” in the Search bar and select Choose a power plan. Now, choose Ultimate Performance. If you can’t see the Ultimate Performance option, click the Show additional plans and then select this option.
You should enable this option only when needed. That’s because it requires high power and can lead to fan noise, heating issues, and reduced battery life.
Tip #6 – Choose Dedicated GPU for gaming
If you have a gaming laptop, you’re likely to have a dual GPU setup, which uses a dedicated GPU as well as an integrated one. Even though the system is designed to automatically switch over to a dedicated GPU when you are playing game, sometimes this doesn’t happen. In that case, you can manually force games to make use of a dedicated GPU (which is more powerful than an integrated GPU) whenever you launch them.
Here’s what to do:
- Type “settings” in the Search bar and hit Enter
- Click Display and then Graphics
- Click Add desktop app to ensure the executable file of your game is added to the list
- Next, choose the High Performance option within the GPU preference option of this computer game
- Repeat these steps for all computer games
Tip # 7 – Turn on Hardware-accelerated GPU Scheduling
This feature allows the GPU to handle its task scheduling. This, in turn, reduces the CPU’s workload. Enabling this feature can improve performance in games that are particularly CPU-intensive. That said, the degree of improvement depends on the installed hardware.
Follow these steps to turn on hardware-accelerated GPU scheduling:
- Type “settings” in the Search bar in the taskbar and hit Enter
- Click System in the left-hand side pane
- Click Display
- Click Graphics and turn on Hardware-accelerated GPU scheduling listed in the Advanced Graphics settings
Tip #8 – Update the Graphics Card Driver
For optimal gaming performance, you need up-to-date graphics card driver. While Windows does update device drivers, you can’t completely rely on it.
To get the latest graphics driver, you can either download it manually from the GPU manufacturer website and then install it. Alternately, you can use a reliable third-party tool that will do all the legwork for you and install the latest driver with just a single click.
Leave a Reply