Experiencing mouse lag in Call of Duty: Modern Warfare?
You’re not alone. This is a common issue that occurs in many games.
When mouse lag occurs, there’s mismatch between the movement of the mouse pointer on the screen and your mouse movement. This, in turn, can spoil your gaming experience.
Fortunately, fixing mouse lag or stuttering is not difficult. In this post, we’ll discuss the four most effective fixes. But before we dig into the solutions, let’s first understand why mouse stuttering occurs.
What triggers mouse lag in Modern Warfare?
Mouse lag can occur due to a number of reasons. Three most common ones are:
- Issues with your mouse – Misconfigured settings or a faulty mouse can lead to mouse stuttering.
- Wrong priority level – The issue can also arise if Modern Warfare’s priority level set in Task Manager is incorrect.
- Outdated drivers – If the mouse driver is outdated, you can experience performance-related issues, including mouse lag
How to fix mouse lag in Call of Duty: Modern Warfare?
Let’s start with some simple tricks before moving on to more complex solutions.
- If you’ve a wired mouse, plug it into another port and see if that fixes the problem. If you are using a wireless mouse, keep its dongle far away from another dongle such as Bluetooth or Wi-Fi receiver.
- If your system has insufficient resources, free up some disk space, unload the CPU, and clear up RAM and check if that works.
- Install the latest Windows Updates, if you’ve not already done so. In addition, if new update is available for Modern Warfare, install it and verify if that helps.
If none of these fixes worked, try the solutions listed below.
Solution #1 – Update your mouse driver
You can update the mouse driver manually or automatically. We recommend the second method, as it is most straightforward. Consider using a reliable third-party tool such as Driver Updater to update your mouse driver. For more information about the software (and its download link), check out the last section of the post.
If are the DIY type, perform the following steps to manually update the mouse driver.
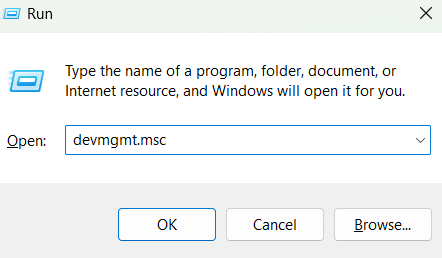
- Press Win + R keys
- Type devmgmt.msc in the Run dialog box
- Locate and expand the Mice and other pointing devices entry
- Right-click your mouse and choose Update driver

- Select Search automatically for drivers
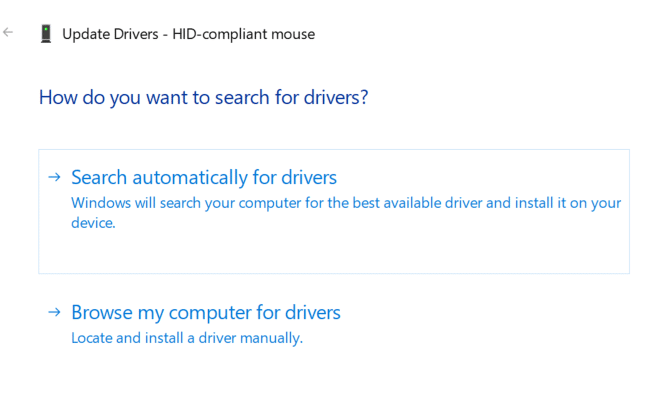
- Windows will install the best driver for your device
If you receive a message that states that the best driver is already installed, consider checking the manufacturer website to see if they have a new version. If you do find a new version for your mouse make and model, download and install it. Just double-check the selected driver is compatible with your Windows version. For example, if you are using a 32-bit Windows 11, download a driver meant for 32-bit Windows 11, not 64-bit Windows 11 or 32-bit Windows 10.
Solution #2 – Change Priority Setting for Modern Warfare
Here’s what to do:
- Open Call of Duty: Modern Warfare
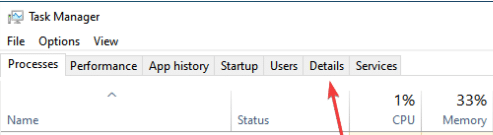
- Press Alt + Enter or Windows and then press Ctrl + Shift + Esc to launch the Task Manager
- Click the Details Tab
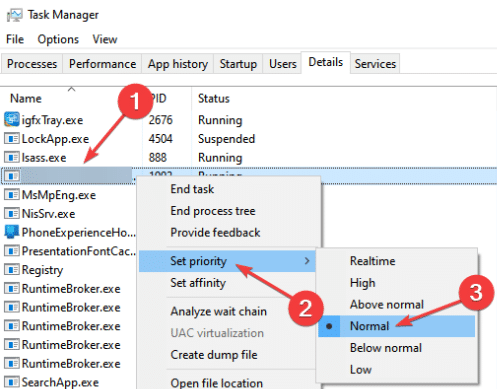
- Locate ModernWarfare.exe, right-click it, select Set Priority, and then select Normal
Now, go back to the Modern Warfare game and check whether there’s still mouse lag. If so, try the next solution.
Solution #3 – Adjust Modern Warfare’s settings
Here’s what to do:
- Open Call of Duty: Modern Warfare
- Open the Options menu, head to Keyboard & Mouse, and then make these changes:
- Disable Mouse Smoothing
- Change Mouse Acceleration to 0.00
- Set Mouse Filtering to 0.00
- Readjust Mouse Sensitivity till you get it right
Solution #4 – Disable Vsync
- Open NVIDIA Control Panel
- Choose Manage 3D settings
- Under the I would like to use the following 3D settings section, select Off from the drop down menu next to Vertical sync
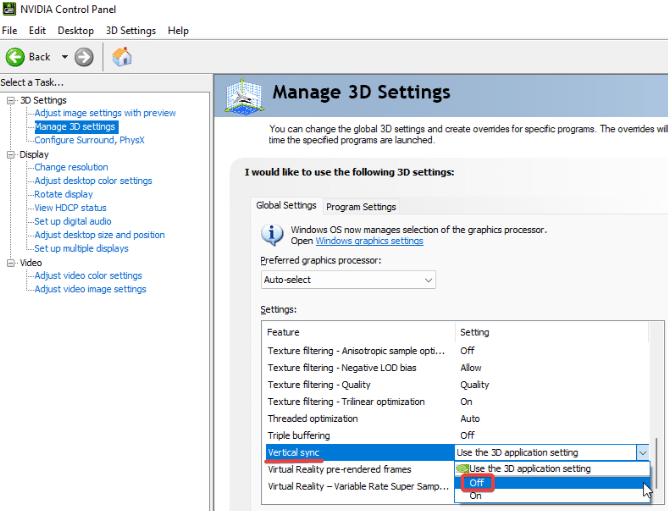
- Click Apply
That’s it. Leave a comment below telling us which one of these solutions worked for you and share the blog post so that others can benefit from it.
Update mouse driver automatically using Driver Updater
As said earlier, the easiest (and the fastest) way to update the mouse driver and other device drivers is by using a third-party tool, such as Driver Updater.
Automatic driver update tools offer many benefits, the most important ones being:
- You can update device drivers automatically
- The software scans and updates all outdated or missing drivers at one go
- The tool picks the right drivers for your device and operating system, so you won’t have to worry about installing an incorrect driver by mistake
- Automatic driver updates are 100% safe
Driver Updater is one of the best driver update tools out there. Outbyte Driver Updater will give you access to a database of over 1 million drivers. It will regularly scan your PC, suggesting new driver versions to install. Driver Updater contains drivers for a variety of Windows devices. With just one click, you can update drivers in your system.
Step 1
Click here to Install and launch the app
Step 2
Scan all devices
Step 3
Install or update drivers automatically
Leave a Reply